SPOOOKLY.COM
Your Trusted Halloween Website
Get the lates Halloween news, Ultimate Halloween Guide – Ideas, Traditions & Spooky Inspiration. From costumes to creepy decor, Spoookly.com brings you the best of Halloween magic!
Read MoreMain Categories
Everything you need to celebrate Halloween in style from events and decor to costumes, food, and party ideas.
Halloween Events
Explore the best Halloween events happening near you from haunted houses to spooky festivals and thrilling parades.
Read moreHalloween Parades
Join the excitement with guides to the biggest and boldest Halloween parades around the world.
Read moreDecor Ideas
Transform your space with creative, spooky, and budget-friendly Halloween decoration ideas for indoors and outdoors.
Read moreFood & Recipes
Whip up spooky snacks, creepy desserts, and Halloween-themed meals everyone will love at your next party.
Read moreCostume Ideas
Find the top Halloween costume ideas for kids, adults, couples, groups, and even pets updated for 2025.
Read moreParty Ideas
Plan the ultimate Halloween bash with fun themes, eerie games, and unforgettable party planning tips.
Read moreSpoookly
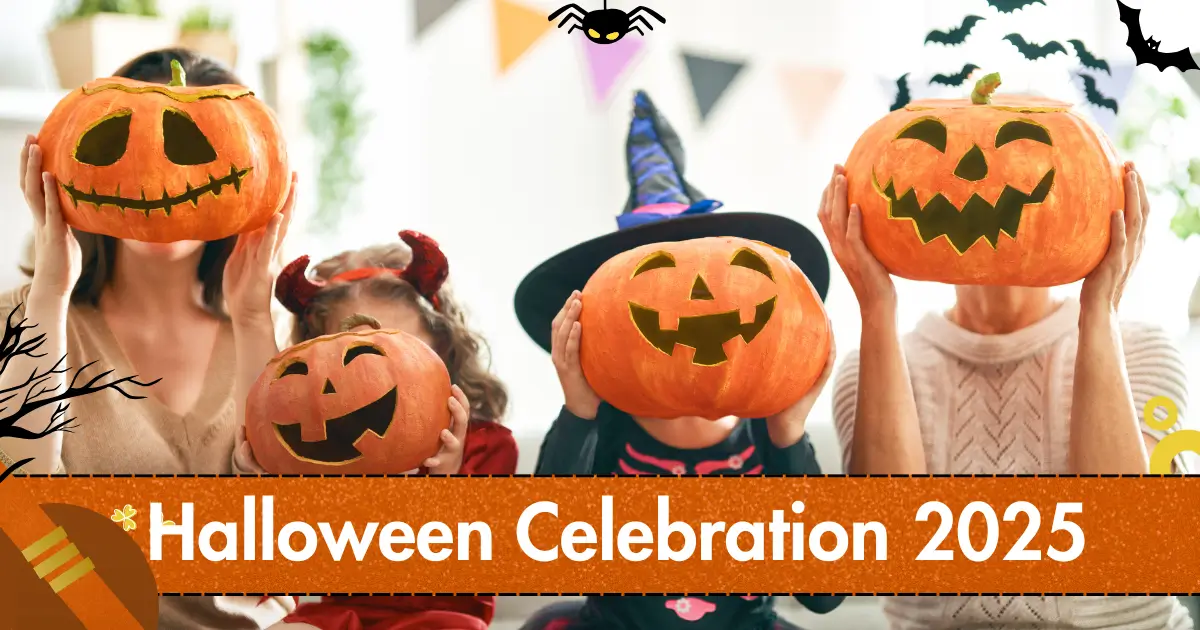
Halloween Celebrations All Over The World 2025
Halloween is not just a holiday, it’s a global celebration of culture, creativity, and community. At Spoookly, Halloween isn’t just once a year. It lives in every spooky DIY, every glowing jack-o’-lantern, and every costume idea we share with our readers. You can also visit our another website for more ideas.
In 2025, it’s bigger, bolder, and more creative than ever. From spooky parades in the USA to haunted lantern festivals in Asia, Halloween has truly become a global celebration. People across countries dress up, decorate homes, cook themed foods, and attend thrilling events all in the spirit of honoring ancient traditions and modern fun.
If you’re looking for the best Halloween ideas, inspiration, and traditions from all over the world, you’ve just landed on the right website. It’s just not just a Halloween website, we’re a team of Halloween lovers, party planners, crafters, and spooky storytellers who live and breathe October vibes all year round.
Why Spoookly.com?
I started Spoookly because I could never find one place that had everything Halloween, from eerie decor tips to creative costume guides, ghostly recipes to party planning tricks, and even historical traditions from every corner of the globe.
Whether you’re decorating your home, throwing a haunted bash, or simply curious about how Halloween is celebrated around the world, we bring it all together neatly, creatively, and always in a way that’s fun and easy to follow.
Why Trust Us?
I started Spoookly out of a love for Halloween not just for the scares, but for the stories, traditions, and community spirit behind it.
Every guide, tip, and resource on this site is carefully researched and created with quality, accuracy, and creativity in mind.
Our editorial team follows strict publishing guidelines to ensure every word adds real value to you and your Halloween plans.
History of Halloween
Halloween started over 2,000 years ago as a Celtic festival known as Samhain. It marked the end of harvest season and the beginning of winter a time believed to blur the boundary between the living and the dead.
People lit bonfires, wore costumes to scare off spirits, and performed rituals to protect their homes. Later, when Christianity spread, All Saints’ Day (All Hallows’ Day) and All Hallows’ Eve were introduced eventually becoming Halloween.
Today, while the rituals have changed, the core ideas of honoring the dead and celebrating community still remain at Halloween’s heart.
Why Is Halloween Celebrated?
Halloween is more than just dressing up or eating candy. It’s a blend of remembrance, fun, folklore, and creativity. People celebrate Halloween to:
- Connect with ancient traditions
- Honor ancestors and the departed
- Enjoy family-friendly fun and games
- Showcase costumes and home decor
- Participate in local parades and events
In 2025, Halloween continues to evolve, mixing traditions with new-age celebrations in exciting ways.
Popular Halloween Traditions and Customs
Every Halloween season brings traditions that fill the air with excitement and mystery. Here are some beloved customs followed around the world:
Costumes and Dress
From witches and vampires to trending movie characters, Halloween is the perfect time for creative costumes. Costumes symbolize both disguise from spirits and fun personal expression.
Decorating Homes
Spooky yards, glowing pumpkins, spider webs, and eerie lighting make homes part of the festive spirit. In many neighborhoods, decor contests and “haunted house routes” are now yearly events.
Trick-or-Treating
Children go door-to-door in costumes, asking for candy with the iconic phrase, “Trick or Treat!” This custom creates memories and strengthens community bonds.
Carving Pumpkins
Known as jack-o’-lanterns, carved pumpkins with glowing faces are placed outside homes. They’re fun to make and have roots in Irish folklore.
Lighting Candles and Bonfires
In some cultures, families light candles or bonfires to remember loved ones. This is common in Halloween’s early traditions and is still part of global customs today.
Modern-Day Celebrations & Symbolism
Halloween in 2025 is more expressive and inclusive than ever before. It’s not just for kids, teens, adults, and even seniors get involved in:
- Spooky escape rooms and VR horror experiences
- Themed restaurant nights and rooftop parties
- Cultural fusion events (e.g., Halloween + Diwali, Halloween + Day of the Dead)
- Pet costume contests and Halloween fashion shows
While the symbols stay pumpkins, black cats, ghosts, skeletons their meanings grow richer. They represent fear, fun, transformation, and celebration of life and death.
Origins of Halloween Symbols
| Tradition | Origin |
|---|---|
| Trick-or-Treating | Medieval England’s “souling” poor children begged for food in return for prayers |
| Jack-o’-Lanterns | Irish legend of “Stingy Jack,” a spirit who roamed the earth with a carved turnip |
| Wearing Costumes | Ancient Celts wore disguises to scare off evil spirits during Samhain |
| Halloween Colors | Orange for harvest and fall; black for darkness and death |
| Haunted Houses | 19th-century gothic literature and 20th-century fairground attractions |
These origins show how folklore, religion, and fun mixed over centuries to become modern Halloween customs.
Where is Halloween Celebrated? Global Reach in 2025
Halloween is no longer limited to North America or Europe. In 2025, it’s celebrated in major cities, small towns, and even remote villages across the world.
Popular Countries That Celebrate Halloween
Let’s discuss where Halloween celebrations are especially strong:
United States
The USA remains the heart of Halloween. From theme parks to street parties, Americans go all out with decor, costumes, and neighborhood events.
Canada
In Canada, Halloween blends fun and fright with community parades, haunted farms, and trick-or-treat trails.
United Kingdom
In the UK, ancient Celtic traditions come alive. Ghost tours, apple bobbing, and costume parties light up October 31st.
Ireland
As the birthplace of Samhain, Ireland holds some of the world’s most authentic Halloween celebrations.
Events include storytelling festivals and bonfire nights.
Mexico
Mexico celebrates Día de los Muertos around the same time. It’s a vibrant and spiritual time with colorful altars, costumes, and sugar skulls.
Germany
Known as “All Saints’ Day Eve,” Halloween is gaining popularity here. People decorate homes, attend parties, and even go trick-or-treating in urban areas.
Philippines
In the Philippines, people celebrate “Pangangaluluwa,” where children sing carols and ask for prayers and treats. Modern Halloween parties and mall events are growing in urban areas.
Japan
Japan hosts spooky theme park nights, cosplay parades, and Halloween-themed shopping. It’s all about fun, creativity, and community gatherings.
Australia & New Zealand
Halloween is growing fast in these regions. Community trick-or-treat routes, school events, and costume contests are popular each year.
Top Halloween Events Around the World (2025)
From haunted forests to citywide festivals, Halloween events in 2025 offer something for everyone.
| Event | Location | Highlights |
|---|---|---|
| Salem Haunted Happenings | Salem, USA | Ghost tours, witch markets, costume balls |
| Derry Halloween Festival | Derry, Northern Ireland | Carnival, fireworks, and haunted walks |
| West Hollywood Halloween Carnaval | California, USA | Street party with thousands of costumed attendees |
| Tokyo Halloween Street Party | Shibuya, Japan | Cosplay parade, live music, themed food |
| Day of the Dead Parade | Mexico City, Mexico | Cultural parades, art displays, ofrendas |
| Village Halloween Parade | New York City, USA | Giant puppets, music bands, costumes |
| Fright Nights | Gold Coast, Australia | Haunted mazes, rides, and themed shows |
| Halloween Horror Nights | Orlando & Hollywood, USA | Universal Studios’ famous scare zones |
| Whitby Goth Weekend | England, UK | Goth culture, Dracula vibes, steampunk themes |
| Tivoli Halloween | Copenhagen, Denmark | Vintage amusement rides with spooky themes |
These events attract millions of visitors each year and are a true mix of history, horror, and fun.
Major Halloween Parades You Can’t Miss
Halloween parades bring people together in colorful, spooky, and creative ways.
- New York City Village Halloween Parade
Over 50,000 costumed participants. Giant puppets and live performances. - San Diego Monster Bash
Street party with music stages, food trucks, and amazing group costumes. - Kawasaki Halloween Parade, Japan
One of Asia’s largest. Strict costume rules. Full cosplay competition feel. - Derry Halloween Parade, Ireland
Carnival floats, historical themes, and ancient folklore brought to life. - West Hollywood Carnaval, USA
LGBT+ friendly. Bold, dramatic costumes and a huge crowd.
These parades make Halloween a truly public celebration uniting people from all walks of life.
Haunted Houses & Ghost Tours Around the Globe
If you’re craving thrills, haunted houses and ghost tours are must-do Halloween experiences.
- The 13th Gate – Louisiana, USA
Movie-like sets. Realistic horror. Very high scare factor. - Netherworld Haunted House – Georgia, USA
Known for its animatronics and monsters. Very immersive. - Pennhurst Asylum – Pennsylvania, USA
Real abandoned asylum turned into a haunted walkthrough. - Edinburgh Vaults – Scotland
Underground tours mixed with real history and ghost sightings. - Ancient Ram Inn – Gloucestershire, UK
One of Britain’s oldest inns. Said to be haunted for centuries. - The Haunted Forest – Romania
Located near Transylvania. A chilling walk through woods tied to vampire folklore.
These attractions combine fright with history creating memories you’ll never forget.
Join Our Spoookly Community
Spoookly isn’t just a Halloween guide it’s a growing community of fans, families, creators, and businesses who live for October 31st. But here, Halloween doesn’t end when November starts.
I created this space to unite everyone who shares a love for costumes, spooky décor, themed foods, and haunted fun. No matter where you’re from or how you celebrate, you’re welcome here.
Be Part of Something Bigger Than Just a Holiday
Halloween is more than just candy and costumes. It’s about imagination, tradition, creativity, and connection.
At Spoookly, you can:
- Share your Halloween photos
- Submit event listings
- Post your own DIY tutorials
- Promote your local Halloween shop
- List your haunted tour or market
- Join our newsletter for updates and ideas
Each submission helps someone else get inspired. And as part of the Spoookly family, your ideas help shape the Halloween experience for readers worldwide.
Share Your Halloween With Us
We love seeing how our community celebrates. Whether it’s a hand-carved pumpkin, a costume you made from scratch, or a decorated front yard it matters.
Send your photos and stories, and you could be featured on:
- Our homepage
- Social media shoutouts
- Spoookly’s weekly Halloween inspiration email
You’ll also be part of our Monthly Spooklight Feature, where we spotlight the most creative submissions.
Halloween 2025 proves that this holiday is more than tricks, treats, and costumes. It’s a living, evolving tradition — celebrated in homes, streets, schools, and hearts across the globe.
From ancient Celtic origins to neon-lit cosplay streets in Asia, the meaning of Halloween shifts across borders but always connects us. We dress up, decorate, cook, craft, and come together to honor memories, embrace creativity, and build community.
At Spoookly, I built this platform to celebrate Halloween in all its forms local or global, simple or grand. It’s your space to learn, share, and get inspired year-round.
So whether you’re planning a backyard ghost walk, hosting a town parade, or just carving pumpkins at home Spoookly is here for you. Let’s keep Halloween alive, together.
FAQs
Halloween will be celebrated on Friday, October 31st, 2025. This year, it falls just in time for an exciting weekend. Expect more evening parties, extended trick-or-treat routes, and late-night events. It’s the perfect setup for a full weekend of spooky fun.
No, Halloween is now a global celebration across Europe, Asia, Latin America, and beyond. Each country adds its own flavor through festivals, food, and customs. From Japan’s cosplay parades to Mexico’s Day of the Dead, it’s widespread. More than 50 countries now observe Halloween in some form.
Halloween started with the Celtic festival Samhain over 2,000 years ago. It marked the end of harvest and a time when spirits crossed into our world. Later, Christian traditions blended in, creating “All Hallows’ Eve.” That evolved into the modern-day Halloween we know today.
This year’s trends include classic monsters, viral characters, and interactive tech outfits. Glow-in-the-dark and LED-lit costumes are trending among all age groups. DIY options like zombie nurses or cereal killers remain crowd favorites. Comfort and creativity are the big themes in 2025.
Try recipes like witch finger cookies, ghost cupcakes, and mummy hot dogs. They’re fun, easy to prepare, and perfect for themed parties or school treats. Pumpkin soup and spooky quesadillas are great savory choices. Add labels and spooky names to make it more festive.
Yes, families can enjoy community trick-or-treat walks, school parades, and local markets. Haunted playgrounds and corn mazes offer thrills without the scares. Look for events organized by city councils, schools, or libraries. They’re safe, social, and perfect for all age groups.
Definitely, Halloween is now celebrated in over 50 countries worldwide. Many cities hold Halloween-themed events, parties, or haunted attractions. Even countries with different traditions join the fun in their own ways. Check local calendars to find out what’s happening near you.
Start with basics: pumpkins, spider webs, candles, and spooky lighting. Add DIY crafts like floating ghosts, tombstones, and bat cutouts. Outdoor decor like skeletons and fog machines create a haunted vibe. Mix traditional and modern elements to match your style.